
Check The Specs...
NAME: Donn Branton
LOCATION: LeRoy, N.Y.
YEARS NO-TILLING: 23
ACRES NO-TILLED: 1,300
CROPS NO-TILLED: No-tills processing peas, wheat, oats and alfalfa; strip-tills soybeans, grain corn, sweet corn and dry beans; zone-tills grain corn, soybeans and oats
I’m trying to figure out the best practices to manage each of our acres in an economical way. I’m not just going to stick with one practice across the whole farm to say I’m doing it. It has to show returns.
That’s one of the reasons I don’t just no-till. Over the years, I’ve found there’s a place for “pure” no-till, zone-till and strip-till on my farm.
Diverse Soils
The region where I farm is known as the breadbasket of New York. Nearby Rochester is known as Flour City due to all the flour mills that used to be located there.
It’s a fertile area, but it presents its challenges, such as rocks. One area on my farm has bedrock that sticks right out of the ground. There’s a stone quarry nearby, but the bedrock on my side of the highway isn’t good enough to mine, so we farm it.
I raise processing peas, soybeans, sweet corn, grain corn, dry beans, wheat, oats and alfalfa on hills and hollows with soils that vary from loamy to sandy to high clay. Some are deep soils; others are very shallow.
The blanket approach doesn’t work for me for fertility or inputs like fungicides. I continually work and plan to make sure each of those investments pays off each year.
I was born and raised with tillage. If it wasn’t loose, you didn’t plant. If it rained, you worked it again. I spent 13 years in the fertilizer and spray business, and that’s all I saw there, too. So when I started my own farm in 1979, I farmed the way my uncle and neighbors did — the conventional way.
In 1985, my interest in no-till started growing. A magazine article showed how a producer, using the same planter as me, was no-tilling with only a slight planter modification.
I had a 3-acre piece of ground that was hidden from the road, so I gave it a try. I just adjusted the down pressure on the springs and planted right between the corn rows from the previous years.
I was skeptical, but harvest wasn’t bad. So I started to pursue no-till attachments.
In 1995, I decided to set up my planter with a three-coulter system to apply nutrients and create a seedbed. At the time, I was running a six-row no-till planter for grain corn; however, I was still doing conventional tillage and planting sweet corn, soybeans and snap beans with a conventional 12-row planter.
Before I could get the coulters on my planter, I went to a Kinze meeting and, after some thought, purchased a 12-row Kinze planter with the Rawson zone-till system.
All Or Nothing
Maintaining two planters by myself seemed like a waste. So in 1996, I decided to either go fishing or cut the bait.
I decided to do a little test. I zone-tilled the grain corn and then split the sweet-corn fields, zone-tilling half and conventionally tilling half. The zone-tilled sweet corn did 2.02 tons better per acre than the conventional, so we parked the plow and stuck with the zone-till.
In subsequent years we’ve harvested sweet corn when our neighbors’ conventional fields failed. We’ve seen better grain quality, greater quantity and improved soil conditions. It’s all been positive.
We also went to zone-till on soybeans, planting in 30-inch rows instead of the 7.5-inch rows we used for conventional soybeans.
The 30-inch spacing produced better yields every time, and we also saw a reduction in equipment expense and fuel consumption with the switch to zone-till.
Experimenting over the years has led us to use tillage practices based on the field, rotation and conditions. We zone-till grain corn, soybeans and sweet corn; strip-till soybeans, grain corn, sweet corn and dry beans; and use a no-till air drill to seed processing peas, wheat, oats and alfalfa.
Fields where bedrock protrudes out of the ground are no-tilled or very lightly zone-tilled. In fields with heavier clay soils, we usually run the strip-till unit to loosen up the soil.
We purchased our first strip-till rig 7 years ago to deal with the challenge of planting dry beans following processing peas, as well as late planting of sweet corn.
Sweet corn gets planted up to July 1, which puts us into some dry soil conditions. Running the strip-till unit ahead of planting made a huge improvement on the seedbed, and it took stress off the planter.
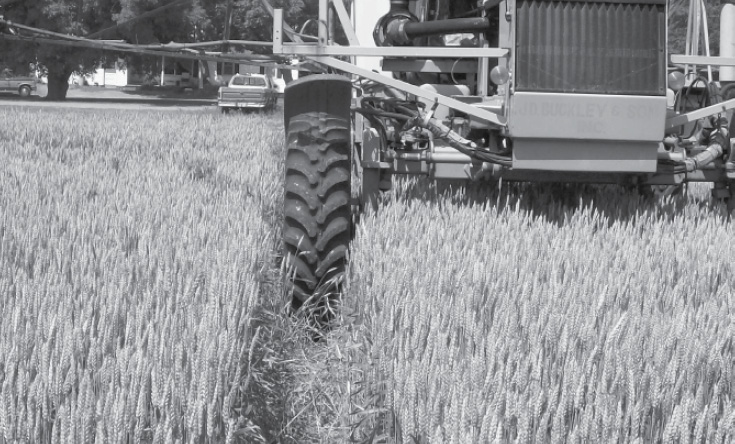
The Unverferth strip-tiller has slicing coulters that cut residue ahead of a narrow shank that runs about 8 inches deep and places nitrogen at the bottom of the slot.
Two wavy coulters, set on an angle, follow that shank to pull dirt back over the slot. Then a rolling basket firms down the soil and breaks up clods.
It only tills about an 8-inch-wide strip. We strip-till anywhere from 1 hour to 2 weeks ahead of planting.
Fertilizing Efficiently
The savings I get in labor, fuel and equipment with reduced-tillage practices are great, but I want efficiency from my fertility program, too. It’s something I’ve continually worked on for 25 years.
Sidedressing used to be the go-to plan, but we ran into timing problems. Even if we started sidedressing at the right time for our crops, we’d be way behind the ideal timing when we finally finished all our acres.
Weather could throw big kinks in the best-laid plans, too. One year, we had to fly on nitrogen because it was just too wet. That’s when we made some changes.
When we were ordering our 12-row Kinze planter in 1996, it was recommended that we set it up to apply nitrogen. That’s one of the best moves we made because yields improved immediately.
The zone-till setup allowed us to put 130 units of actual nitrogen 3 inches on either side of the row and incorporate it slightly.
While it guaranteed our nitrogen was in place, it did make planting a little cumbersome. I could only plant 13.5 acres per fill and, at best, cover 73 acres in a day. Field conditions sometimes meant driving 2.5 mph to get everything done right. Some days it felt like I wasn’t getting anything done.
But I had to remember that there was no way I could cover that many acres in 1 day with conventional tillage. And getting the nitrogen down with the planter, instead of sidedressing, meant less weather conflicts.
Strip-Till’s Role
Bringing the strip-till unit into our operation to loosen dry ground for late planting made us think about fertility again.
A 3-year study done on our farm in conjunction with Cornell University helped us determine how to best use our available equipment to manage fertility.
The study compared zone-till nitrogen application to deep-placed strip-till nitrogen. Deep-placing nitrogen — we put it at 8 to 12 inches deep — with our strip-till unit produced far superior yields to planter-placed nitrogen.
Loosening the soil made a better seedbed. And having the nitrogen under the plants made it available when they needed it. Additionally, we think we’re losing less nitrogen by placing it deeper in the soil, where it’s cooler and there’s less microbial activity.
Another step we’ve taken to keep our nitrogen in place is mix our applied nitrogen with 10% ammonium thiosulfate. The sulfur provides some nitrogen stabilization.
Digging root pits in the test plots showed us the strip-till system produced larger, healthier root balls.
Unfortunately, strip-till alone won’t work for us in every field in every year. In fields that are corn-on-corn we’ll put 30 gallons of nitrogen on with the strip-till unit, and an additional 15 gallons of nitrogen on with the planter to give the crop a boost until it hits the deep-placed nitrogen.
When planting grain corn into wheat that had a clover cover crop, we usually stick with strip-tilling 20 gallons of nitrogen.
Banding Is Better
No matter the nutrient or the tool we use for application, we feel nutrient banding is the way to go. We try to band everything, including phosphorus, because it’s far more efficient than broadcast application.
I’ve been experimenting with phosphorus banding since 1979, and now I have the planter and my no-till air drill set up to band phosphorus in the seed furrow.
On the planter, we use a system similar to the Totally Tubular setup. It’s a stainless-steel tube that attaches to the seed tube to lay down a line of phosphorus in the seedbed right before seeds are placed.
We use a fairly low rate of 5 to 7.5 gallons per acre of 9-25-3 Alpine food-grade phosphate, a low-salt, seed-safe product. We’ve played around with different phosphorus sources, but this one causes fewer issues with plugging the screens on the delivery system.
Suspension-grade fertilizer worked great for plant-growth performance, but caused screen plugging and application problems.
In The Zone
We want to get each acre exactly what nutrients and fertilizer it needs, so our soil-testing protocol is pretty intense.
We have tested in 1-acre grids and by soil type. Now we test by soil type at least once every 3 years. We use this data to break up our fields into management zones.
We’re able to do variable-rate applications with our planter. Until recently, none of the custom applicators in our area could variable-rate potash and lime, which we feel is pretty important.
Now that they’re able to do variable rate, we’re fine-tuning our management zones and our applications.
To determine each zone’s needs, we look at past fertilizer rates, soil tests, cropping history and yield potential and then do plots to help further dial in the right rates.
We’ve found the fertilizer rates can be set much lower than what you’d think, especially with nitrogen.
When we started, we were applying about 1 pound of nitrogen per bushel of dry corn. Strategic placement cut that number back a bit, but then we noticed we were putting on a certain amount of nitrogen and getting yields that exceeded our expectations for that amount.
We started questioning where the extra yield was coming from. We did a small study and compared our findings with what Cornell was finding with their nitrogen studies. Our yields vs. applied nitrogen seemed to max out at about 130 units across most of the plots, similar to what Cornell saw in their research. So we started dialing back our nitrogen rates.
Our applied nitrogen now averages around 0.46 pounds per bushel of dry grain corn produced. In addition to dialing back applied nitrogen rates, this low number is possible, we feel, due to our focus on improving drainage, soil testing, regular applications of lime and gypsum, cover crops and deep-banding our nitrogen.
While nitrogen applications have gone down, our yields have increased. We set a new yield record in 2009 at 182 bushels. It’s all about using our inputs more efficiently.
Cover Crop With A Purpose
We’ve dabbled in cover crops for years. Our first attempt was planting medium red clover with wheat. Then we tried cereal rye after sweet corn and have done trials with annual ryegrass, tillage radish and other covers.
Early on, we didn’t have much focus and just tried what the neighbors were doing. Now we’re more conscious of what we do with our cover crops.
In our rotation, winter wheat is planted in the fall after harvest of processing peas. The following spring, we’ll frost seed clover into the wheat.
Frost seeding works exceptionally well most years. We mix the seed with some dry ammonium sulfate and airflow it on to get the efficiencies of two operations in one pass. It gives the wheat a little boost early.
Grain corn or sweet corn is usually next in the rotation and I’ve found we can reduce applied nitrogen by 50% after the clover cover. We’ve done test plots to prove it.
The benefits are obvious in the soil, too. We’ve seen earthworm populations increase and the soil seems healthier. There’s better water infiltration and the structure has improved.
Pushing Wheat Yields
No-till wheat has worked well in our operation and we’ve started pushing it to produce even more.
We were hitting the mid-70s for average yield, but started working with Phil Needham and have since pushed that to the mid-90s.
One of our first big improvements was — once again — nitrogen management. We went to a more direct application, using stream bars instead of broadcasting.
Now, we’re on our second set of stream-bar nozzles. Shallow and deep nitrate testing, combined with previous crop-rotation information, helped us dial in our rates. We typically pull soil tests in late summer, before planting wheat.
Population adjustments have also been made. We used to plant in bushels per acre, but there’s a huge difference in seeds per pound from variety to variety.
Now we use the seed company’s recommendation and usually end up planting about 1.5 million seeds per acre.
Test It Out
Some people say I got lucky with my no-till and minimum-till success. Many people in my area tried it during the mid-70s and failed due to management mistakes and misapplications.
My success wasn’t luck. We do lots of test plots to see what works best on our farm. You’ve got to step back and look at things objectively.
In 2010, we did side-by-side trials of fungicide applications on our wheat. A 25% yield increase, and a new farm-yield record of 112 bushels per acre, showed that fungicides were a no-brainer for us.
There was also a 2-pound-per-bushel increase in test weight with fungicides, and that was in a year where university prediction models said the conditions were not indicative of disease pressure.
You must think about what you’re doing in future years to do the right thing this year. I’ve done tillage trials, fertility plots, cover-crop plots and more, and that’s how I know if it’s working.


Post a comment
Report Abusive Comment